webdesign-android-devlopement-news-portal-designing-india-indore-bhopal-mp

Show Author Profile Picture Next To Google Search Results

Posted :| Posted By: Piush Trivedi | Labels: , 1 Comments

Google webmaster team has introduced an easy way of displaying your Google+ profile picture next to the links of your website or blog or any content that you generate. You might have seen profile pictures or image thumbnails of Google developers appearing on search results page. Previously only reserved users had this option but now thanks to the generosity of Google+ social network, even you can display your profile picture next to all your articles or webpages that you own. This will be a proof that you are the sole author and owner of that site or blog. The author information will be shared globally on Google results and your visitors can see your image and author information link next to your article. This is a great way to attract visitors and increase website traffic. Lets learn how to do it!
  • A website or blog that you own
  • A Google Plus Account
  • An About Me page on your blog. If you already have an about page where information about author is given then you need not worry. However if you don’t have an about page then you must create one now.

If you have met the above three conditions then you may follow these steps:

Step 1:-

On your website sidebar or header or footer add this link,

<a href="https://plus.google.com/GOOGLE+ ID"
  rel="author" target="_blank"> Join me on Google+</a>


Do not remove rel="author" else the trick wont work!


Step 2:-

Next go to your About Me page and add this link anywhere you want,

<a href="https://plus.google.com/GOOGLE+ ID"
  rel="me" target="_blank"> My Google Profile</a>


Again replace the Google+ ID with your Profile ID. You can edit the text My Google Profile if you wish.

Step 3:-

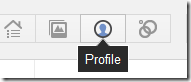
Now go to your G+ profile and click the “Edit Profile” button

Then click on the "LINKS" area as shown below,

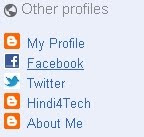
Add your Blog/site homepage URL and also the URL of your About page. You can also add your Facebook and twitter links if you wish.

Step 4:-


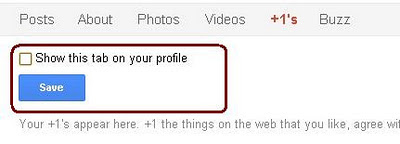
Finally Save your profile and you are almost done:)

Test How your profile photo will appear on SERPs


If you have followed all steps correctly then you will be able to clearly see your photo and name appearing next to your blog title and description. You will also see this green message: "Verified: Authorship markup is correct for this page"

Continue Reading


How To Add Yahoo Smiley on Blogger Threaded Comments

Posted :| Posted By: Piush Trivedi | Labels: , 4 Comments

With This Simple Hack, Your Blog Readers Are Now Able To Use Yahoo Smileys/Emoticons When They Comment On Any Of your blog posts. I am sure that your readers will really get excited and enjoy using These Yahoo! Smileys. This Hack Will Only Work If You’ve Enabled Embedded Comment Form Feature For Your Blog.Follow These Steps Below To Install This Feature To Your Blog’s Template. Always Remember To Save A Copy Of Your Template Before Start Editing Your Template.


How To Use

To add these smileys, follow these 3 steps:

Step 1

  • First log in to Blogger
  • Go To Dashbord > Design > Edit HTML
  • And Click On Expand Widgets Tick Box
  • Now find this code : ]]></b:skin>
  • And just BEFORE it, add this line:

<!-- Yahoo Smileys by aptechindia.blogspot.com Code Start-->
.aptsmile {
    background: none repeat scroll 0 0 #EFF5FB !important;
    font-size: medium !important;
    padding: 10px !important;
    text-align: left !important;
    font-weight:bold !important;
    font-size:11px !important;
}
img.aptechsmly {
    height: auto !important;
    vertical-align: middle !important;
    width: auto !important;
    border:0px !important;
}
<!-- aptechindia.blogspot.com Code End-->


Step 2

  • Now find this code On Your Template: </body>
  • And just BEFORE it, add this line:
<!-- Yahoo Smileys Script aptechindia.blogspot.com -->
<script src='https://piushtrivedi.googlecode.com/svn/trunk/Aptech_india/ysmiley_Aptech.js' type='text/javascript'/>

Step 3

  • Now find this code On Your Template: <div class='post-footer-line post-footer-line-3'>
  • <div class='post-footer-line post-footer-line-3'>
    code...
    </div>
    </b:includable>
  • And just After it, add this line:

<!-- Yahoo Smileys by aptechindia.blogspot.com Start-->
<b:if cond='data:blog.pageType == &quot;item&quot;'>
<div style='background-color:#FEF8EC; border:none; width:100%; padding:10px; height:100px; overflow:auto;'>
<div class='aptsmile'>
<img alt='' class='aptechsmly' src='https://l.yimg.com/us.yimg.com/i/mesg/emoticons7/1.gif'/> :)
<img alt='' class='aptechsmly' src='https://l.yimg.com/us.yimg.com/i/mesg/emoticons7/2.gif'/> :(
<img alt='' class='aptechsmly' src='https://l.yimg.com/us.yimg.com/i/mesg/emoticons7/3.gif'/> ;)
<img alt='' class='aptechsmly' src='https://l.yimg.com/us.yimg.com/i/mesg/emoticons7/4.gif'/> :D
<img alt='' class='aptechsmly' src='https://l.yimg.com/us.yimg.com/i/mesg/emoticons7/5.gif'/> ;;-)
<img alt='' class='aptechsmly' src='https://l.yimg.com/us.yimg.com/i/mesg/emoticons7/7.gif'/> :-/
<img alt='' class='aptechsmly' src='https://l.yimg.com/us.yimg.com/i/mesg/emoticons7/8.gif'/> :x
<img alt='' class='aptechsmly' src='https://l.yimg.com/us.yimg.com/i/mesg/emoticons7/10.gif'/> :P
<img alt='' class='aptechsmly' src='https://l.yimg.com/us.yimg.com/i/mesg/emoticons7/11.gif'/> :-*
<img alt='' class='aptechsmly' src='https://l.yimg.com/us.yimg.com/i/mesg/emoticons7/12.gif'/> =((
<img alt='' class='aptechsmly' src='https://l.yimg.com/us.yimg.com/i/mesg/emoticons7/13.gif'/> :-O
<img alt='' class='aptechsmly' src='https://l.yimg.com/us.yimg.com/i/mesg/emoticons7/14.gif'/> X(
<img alt='' class='aptechsmly' src='https://l.yimg.com/us.yimg.com/i/mesg/emoticons7/15.gif'/> :7
<img alt='' class='aptechsmly' src='https://l.yimg.com/us.yimg.com/i/mesg/emoticons7/16.gif'/> B-)
<img alt='' class='aptechsmly' src='https://l.yimg.com/us.yimg.com/i/mesg/emoticons7/17.gif'/> :-S
<img alt='' class='aptechsmly' src='https://l.yimg.com/us.yimg.com/i/mesg/emoticons7/18.gif'/> #:-S
<img alt='' class='aptechsmly' src='https://l.yimg.com/us.yimg.com/i/mesg/emoticons7/19.gif'/> 7:)
<img alt='' class='aptechsmly' src='https://l.yimg.com/us.yimg.com/i/mesg/emoticons7/20.gif'/> :((
<img alt='' class='aptechsmly' src='https://l.yimg.com/us.yimg.com/i/mesg/emoticons7/21.gif'/> :))
<img alt='' class='aptechsmly' src='https://l.yimg.com/us.yimg.com/i/mesg/emoticons7/22.gif'/> :|
<img alt='' class='aptechsmly' src='https://l.yimg.com/us.yimg.com/i/mesg/emoticons7/23.gif'/> /:)
<img alt='' class='aptechsmly' src='https://l.yimg.com/us.yimg.com/i/mesg/emoticons7/24.gif'/> =))
<img alt='' class='aptechsmly' src='https://l.yimg.com/us.yimg.com/i/mesg/emoticons7/25.gif'/> O:-)
<img alt='' class='aptechsmly' src='https://l.yimg.com/us.yimg.com/i/mesg/emoticons7/26.gif'/> :-B
<img alt='' class='aptechsmly' src='https://l.yimg.com/us.yimg.com/i/mesg/emoticons7/27.gif'/> =;
<img alt='' class='aptechsmly' src='https://l.yimg.com/us.yimg.com/i/mesg/emoticons7/101.gif'/> :-c
<img alt='' class='aptechsmly' src='https://l.yimg.com/us.yimg.com/i/mesg/emoticons7/100.gif'/> :)]
<img alt='' class='aptechsmly' src='https://l.yimg.com/us.yimg.com/i/mesg/emoticons7/102.gif'/> ~X(
<img alt='' class='aptechsmly' src='https://l.yimg.com/us.yimg.com/i/mesg/emoticons7/103.gif'/> :-h
<img alt='' class='aptechsmly' src='https://l.yimg.com/us.yimg.com/i/mesg/emoticons7/104.gif'/> :-t
<img alt='' class='aptechsmly' src='https://l.yimg.com/us.yimg.com/i/mesg/emoticons7/105.gif'/> 8-7
<img alt='' class='aptechsmly' src='https://l.yimg.com/us.yimg.com/i/mesg/emoticons7/28.gif'/> I-)
<img alt='' class='aptechsmly' src='https://l.yimg.com/us.yimg.com/i/mesg/emoticons7/29.gif'/> 8-|
<img alt='' class='aptechsmly' src='https://l.yimg.com/us.yimg.com/i/mesg/emoticons7/29.gif'/> L-)
<img alt='' class='aptechsmly' src='https://l.yimg.com/us.yimg.com/i/mesg/emoticons7/31.gif'/> :-a
<img alt='' class='aptechsmly' src='https://l.yimg.com/us.yimg.com/i/mesg/emoticons7/32.gif'/> :-$
<img alt='' class='aptechsmly' src='https://l.yimg.com/us.yimg.com/i/mesg/emoticons7/33.gif'/> [-(
<img alt='' class='aptechsmly' src='https://l.yimg.com/us.yimg.com/i/mesg/emoticons7/34.gif'/> :O)
<img alt='' class='aptechsmly' src='https://l.yimg.com/us.yimg.com/i/mesg/emoticons7/35.gif'/> 8-
<img alt='' class='aptechsmly' src='https://l.yimg.com/us.yimg.com/i/mesg/emoticons7/36.gif'/> 2:-P
<img alt='' class='aptechsmly' src='https://l.yimg.com/us.yimg.com/i/mesg/emoticons7/37.gif'/> (:|
<img alt='' class='aptechsmly' src='https://l.yimg.com/us.yimg.com/i/mesg/emoticons7/38.gif'/> =P~
<img alt='' class='aptechsmly' src='https://l.yimg.com/us.yimg.com/i/mesg/emoticons7/39.gif'/>
<img alt='' class='aptechsmly' src='https://l.yimg.com/us.yimg.com/i/mesg/emoticons7/40.gif'/> #-o
<img alt='' class='aptechsmly' src='https://l.yimg.com/us.yimg.com/i/mesg/emoticons7/41.gif'/> =D7
<img alt='' class='aptechsmly' src='https://l.yimg.com/us.yimg.com/i/mesg/emoticons7/42.gif'/> :-SS
<img alt='' class='aptechsmly' src='https://l.yimg.com/us.yimg.com/i/mesg/emoticons7/43.gif'/> @-)
<img alt='' class='aptechsmly' src='https://l.yimg.com/us.yimg.com/i/mesg/emoticons7/44.gif'/> :^o
<img alt='' class='aptechsmly' src='https://l.yimg.com/us.yimg.com/i/mesg/emoticons7/45.gif'/> :-w
<img alt='' class='aptechsmly' src='https://l.yimg.com/us.yimg.com/i/mesg/emoticons7/47.gif'/> 7:P
<img alt='' class='aptechsmly' src='https://l.yimg.com/us.yimg.com/i/mesg/emoticons7/48.gif'/> 2):)
<img alt='' class='aptechsmly' src='https://l.yimg.com/us.yimg.com/i/mesg/emoticons7/109.gif'/> X_X
<img alt='' class='aptechsmly' src='https://l.yimg.com/us.yimg.com/i/mesg/emoticons7/110.gif'/> :!!
<img alt='' class='aptechsmly' src='https://l.yimg.com/us.yimg.com/i/mesg/emoticons7/111.gif'/> \m/
<img alt='' class='aptechsmly' src='https://l.yimg.com/us.yimg.com/i/mesg/emoticons7/112.gif'/> :-q
<img alt='' class='aptechsmly' src='https://l.yimg.com/us.yimg.com/i/mesg/emoticons7/113.gif'/> :-bd
<img alt='' class='aptechsmly' src='https://l.yimg.com/us.yimg.com/i/mesg/emoticons7/114.gif'/> ^#(^
<img alt='' class='aptechsmly' src='https://l.yimg.com/a/i/us/msg/emoticons/pirate_2.gif'/> :ar!
</div></div></b:if>
<!-- Yahoo Smileys by aptechindia.blogspot.com End-->


Finally save the template :)
Continue Reading


Recent Comments Widget For Blogger

Posted :| Posted By: Piush Trivedi | Labels: 1 Comments

This post explains how you can add Recent Comments widget for Blogger Blogspot blogs.Once the reader finds a recent comments widget in the sidebar of the blog, will come to know that your blog is quite active and invites you to send comments on his blog. In this way you can collect some active user base to comment on your blog posts.Now you can reward your best commentators, showing their names with clickable links to your Blogger blog and it helps to see that comments in his blog more often.


How To Use

Fell All Details & Then
  • ReplaceNext, Prev Text
  • Now Click On "Generate"
  • Then Press Add to Blogger Button


Continue Reading


Numbered page navigation for blogger

Posted :| Posted By: Piush Trivedi | Labels: 1 Comments

Today we are going to see how to add a beautifull numbered page navigation hack in blogger. The default navigation links (i.e Older Posts) are not visitor friendly if you are having a large amount of posts and readers.Few bloggers has some problems with previous Page Navigation script. Now here is a completely new and working script for Numbered Page Navigation (i.e. Panigation) for Blogger. The pagination widget for blogger make it simple for your visitor. Its a must have widget for any blogspot blogs.This new script allows you to add numbered page navigation to blogger/ blogspot blog with page numbers starting(1, 2, 3, 4 ….) like those of a book.

How To Use

  • Choose A Navigation Style
  • ReplaceNext, Prev Text
  • Now Click On "Generate"
  • Then Press Add to Blogger Button

>
Continue Reading