webdesign-android-devlopement-news-portal-designing-india-indore-bhopal-mp
Showing posts with label tricks. Show all posts

Breadcrumbs Navigation For Blogger Blog

Posted :| Posted By: Piush Trivedi | Labels: , , 2 Comments

Breadcrumb navigation is a row of links, internal link at the top or bottom of the page web site that allows visitors to return to the previous or to the bottom pages quickly. However, the current placement is more often used breadcrumb at the top of the page the article posting. Breadcrumb link sequence starting from home (homepage) and ends with a post title of the article being read. For example :
Browse » Home » Breadcrumb Navigation » Breadcrumb Navigation in Blogger.

Blog Screenshot


Search Engine Screenshot


If You Want Add Breadcrumb Navigation To Your Blogger Blog You May Follow These Steps::-)

Step 1 :-

  • First Login To Blogger Go To Blogger--->Design--->Edit HTML
  • And Click On Expand Widgets Tick Box
  • Now find this code : ]]></b:skin>
  • & Just Before It Paste Above CSS Code
.breadcrumbs {
padding:5px 5px 5px 0px;
margin: 0px 0px 15px 0px;
font-size:95%;
line-height: 1.4em;
border-bottom:3px double #e6e4e3;
}


Step 2 :-

  • Now find this code : <b:include data='top' name='status-message'/> On Your Blog Templete
  • And just AFTER it, add this Code:
<b:include data='posts' name='breadcrumb'/>


Step 3 :-

  • Now find this code : <b:includable id='main' var='top'> On Your Blog Templete
  • And just BEFORE it, add this Code:
<b:includable id='breadcrumb' var='posts'>
<b:if cond='data:blog.homepageUrl != data:blog.url'>
<b:if cond='data:blog.pageType == "static_page"'>
<div class='breadcrumbs'><span><a expr:href='data:blog.homepageUrl' rel='tag'>Home</a></span> » <span><data:blog.pageName/></span></div>
<b:else/>
<b:if cond='data:blog.pageType == "item"'>
<!-- breadcrumb for the post page -->
<b:loop values='data:posts' var='post'>
<b:if cond='data:post.labels'>
<div class='breadcrumbs' xmlns:v="https://rdf.data-vocabulary.org/#">
<span typeof="v:Breadcrumb"><a expr:href='data:blog.homepageUrl' rel="v:url" property="v:title">Home</a></span>
<b:loop values='data:post.labels' var='label'>
<b:if cond='data:label.isLast == "true"'>
» <span typeof="v:Breadcrumb"><a expr:href='data:label.url' rel="v:url" property="v:title"><data:label.name/></a></span>
</b:if>
</b:loop>
» <span><data:post.title/></span>
</div>
<b:else/>
<div class='breadcrumbs'><span><a expr:href='data:blog.homepageUrl' rel='tag'>Home</a></span> » <span>Unlabelled</span> » <span><data:post.title/></span></div>
</b:if>
</b:loop>
<b:else/>
<b:if cond='data:blog.pageType == "archive"'>
<!-- breadcrumb for the label archive page and search pages.. -->
<div class='breadcrumbs'>
<span><a expr:href='data:blog.homepageUrl'>Home</a></span> » <span>Archives for <data:blog.pageName/></span>
</div>
<b:else/>
<b:if cond='data:blog.pageType == "index"'>
<div class='breadcrumbs'>
<b:if cond='data:blog.pageName == ""'>
<span><a expr:href='data:blog.homepageUrl'>Home</a></span> » <span>All posts</span>
<b:else/>
<span><a expr:href='data:blog.homepageUrl'>Home</a></span> » <span>Posts filed under <data:blog.pageName/></span>
</b:if>
</div>
</b:if>
</b:if>
</b:if>
</b:if>
</b:if>
</b:includable>


Finally Save Your Blog Template.. :-)
Continue Reading


Author About Bio Box For Blogger Blog

Posted :| Posted By: Piush Trivedi | Labels: , 1 Comments

In this tutorial, I will show you how to easily develop and display the Author´s Bio box in your Blogger posts without the need of a plugin ... Are you putting a face to your articles? How about the author´s background and contact information? The author´s profile box is a great idea for your blog as it can help with user interaction and puts a face to the author, and offers the chance to mention other projects or services.

Screenshot


How To Use
  • Feel All Field
  • Change Widget Setting
  • Now Click On genrate Button
  • For Live Preview ...Click On Preview Button
  • Finally Click On Add To Blogger Button


If you Want Place This Widget On Your Blog Plz follow These Steps:

Step 1 :-

  • First Login To Blogger Go To Blogger--->Design--->Edit HTML
  • And Click On Expand Widgets Tick Box
  • Now find this code : ]]></b:skin>
  • & Just Before It Paste Above CSS Code Placed On Widget Genrator


Step 2 :-

  • Now find this code : <div class='post-footer-line post-footer-line-1'>
  • & Just After This Code <div class='post-footer-line post-footer-line-1'> Paste Above HTML Code Placed On Widget Genrator
Continue Reading


Reply Button Not Working Blogger Threaded Comment

Posted :| Posted By: Piush Trivedi | Labels: , 32 Comments

Earlier this month Blogger introduced a long-a waited feature, native threaded comments – with only one level, but still pretty nice to delimit conversations. The instructions sounded easy enough, just a couple of settings to change and the new reply system should kick in. Unfortunately in practice both myself and many other have stumbled across a couple of problems…when clicking on the ‘Reply’ button nothing happened...! It looked like there was a missing script and I spent a considerable amount of time trying to track down the source of this problem. First I tried to replace the blog template with a completely new one, which I thought would have the proper updated code – that turned out not to be the case. I compared the source code of an article on my blog to others where the replies were working correctly and I discovered there was indeed a script missing for me Plz Read Above Tutorial Carefully & follow these steps:

Important:-Before Editing Template ..Plz Backup Your Full Template.....


Step 1

  • First log in to Blogger
  • Go To Dashbord > Design > Edit HTML
  • And Click On Expand Widgets Tick Box
  • Now find this code : <b:includable id='threaded_comment_js' var='post'>
  • & Replace This Code & Script With Above Code & Script....


<b:includable id='threaded_comment_js' var='post'>
<script async='async' expr:src='data:post.commentSrc' type='text/javascript'/>
<script type='text/javascript'>
(function() {
var items = <data:post.commentJso/>;
var msgs = <data:post.commentMsgs/>;
var config = <data:post.commentConfig/>;
// <![CDATA[
var cursor = null;
if (items && items.length > 0) {
cursor = parseInt(items[items.length - 1].timestamp) + 1;
}
var bodyFromEntry = function(entry) {
if (entry.gd$extendedProperty) {
for (var k in entry.gd$extendedProperty) {
if (entry.gd$extendedProperty[k].name == 'blogger.contentRemoved') {
return '<span class="deleted-comment">' + entry.content.$t + '</span>';
}
}
}
return entry.content.$t;
}
var parse = function(data) {
cursor = null;
var comments = [];
if (data && data.feed && data.feed.entry) {
for (var i = 0, entry; entry = data.feed.entry[i]; i++) {
var comment = {};
// comment ID, parsed out of the original id format
var id = /blog-(\d+).post-(\d+)/.exec(entry.id.$t);
comment.id = id ? id[2] : null;
comment.body = bodyFromEntry(entry);
comment.timestamp = Date.parse(entry.published.$t) + '';
if (entry.author && entry.author.constructor === Array) {
var auth = entry.author[0];
if (auth) {
comment.author = {
name: (auth.name ? auth.name.$t : undefined),
profileUrl: (auth.uri ? auth.uri.$t : undefined),
avatarUrl: (auth.gd$image ? auth.gd$image.src : undefined)
};
}
}
if (entry.link) {
if (entry.link[2]) {
comment.link = comment.permalink = entry.link[2].href;
}
if (entry.link[3]) {
var pid = /.*comments\/default\/(\d+)\?.*/.exec(entry.link[3].href);
if (pid && pid[1]) {
comment.parentId = pid[1];
}
}
}
comment.deleteclass = 'item-control blog-admin';
if (entry.gd$extendedProperty) {
for (var k in entry.gd$extendedProperty) {
if (entry.gd$extendedProperty[k].name == 'blogger.itemClass') {
comment.deleteclass += ' ' + entry.gd$extendedProperty[k].value;
}
}
}
comments.push(comment);
}
}
return comments;
};
var paginator = function(callback) {
if (hasMore()) {
var url = config.feed + '?alt=json&v=2&orderby=published&reverse=false&max-results=50';
if (cursor) {
url += '&published-min=' + new Date(cursor).toISOString();
}
window.bloggercomments = function(data) {
var parsed = parse(data);
cursor = parsed.length < 50 ? null
: parseInt(parsed[parsed.length - 1].timestamp) + 1
callback(parsed);
window.bloggercomments = null;
}
url += '&callback=bloggercomments';
var script = document.createElement('script');
script.type = 'text/javascript';
script.src = url;
document.getElementsByTagName('head')[0].appendChild(script);
}
};
var hasMore = function() {
return !!cursor;
};
var getMeta = function(key, comment) {
if ('iswriter' == key) {
var matches = !!comment.author
&& comment.author.name == config.authorName
&& comment.author.profileUrl == config.authorUrl;
return matches ? 'true' : '';
} else if ('deletelink' == key) {
return config.baseUri + '/delete-comment.g?blogID='
+ config.blogId + '&postID=' + comment.id;
} else if ('deleteclass' == key) {
return comment.deleteclass;
}
return '';
};
var replybox = null;
var replyUrlParts = null;
var replyParent = undefined;
var onReply = function(commentId, domId) {
if (replybox == null) {
// lazily cache replybox, and adjust to suit this style:
replybox = document.getElementById('comment-editor');
if (replybox != null) {
replybox.height = '250px';
replybox.style.display = 'block';
replyUrlParts = replybox.src.split('#');
}
}
if (replybox && (commentId !== replyParent)) {
document.getElementById(domId).insertBefore(replybox, null);
replybox.src = replyUrlParts[0]
+ (commentId ? '&parentID=' + commentId : '')
+ '#' + replyUrlParts[1];
replyParent = commentId;
}
};
var hash = (window.location.hash || '#').substring(1);
var startThread, targetComment;
if (/^comment-form_/.test(hash)) {
startThread = hash.substring('comment-form_'.length);
} else if (/^c[0-9]+$/.test(hash)) {
targetComment = hash.substring(1);
}
// Configure commenting API:
var configJso = {
'maxDepth': config.maxThreadDepth
};
var provider = {
'id': config.postId,
'data': items,
'loadNext': paginator,
'hasMore': hasMore,
'getMeta': getMeta,
'onReply': onReply,
'rendered': true,
'initComment': targetComment,
'initReplyThread': startThread,
'config': configJso,
'messages': msgs
};
var render = function() {
if (window.goog && window.goog.comments) {
var holder = document.getElementById('comment-holder');
window.goog.comments.render(holder, provider);
}
};
// render now, or queue to render when library loads:
if (window.goog && window.goog.comments) {
render();
} else {
window.goog = window.goog || {};
window.goog.comments = window.goog.comments || {};
window.goog.comments.loadQueue = window.goog.comments.loadQueue || [];
window.goog.comments.loadQueue.push(render);
}
})();
// ]]>
</script>
</b:includable>


Now Save Your Templete :-)
Continue Reading


Loading Time Indicator For Blogger Blog

Posted :| Posted By: Piush Trivedi | Labels: 21 Comments


This is another cool blogger gadget to your blog. " Loading Time Indicator" is a small and clear blogger gadget. It's indicate your blogger loading time. i'll have a many loading time indicators. but here you can get good loading time indicator gadget! so it's very easy to add your blog. please follow below steps. congrates!

How To Use

  • Go TO Blogger--->Design--->Page Element
  • Click On Add a Gadget
  • Choose html/javascript
  • Past Below Code Inside It.


<!-- INSTALL LOADING TIME INDICATOR By www.aptechindia.blogspot.com:------>

<script type="text/javascript">
<!-- Begin
/* This script and many more are available free online at
The JavaScript Source!! https://javascript.internet.com
Created by: Abraham Joffe :: https://www.abrahamjoffe.com.au/ */

var startTime=new Date();

function currentTime(){
var a=Math.floor((new Date()-startTime)/100)/10;
if (a%1==0) a+=".0";
document.getElementById("endTime").innerHTML=a;
}

window.onload=function(){
clearTimeout(loopTime);
}

// End -->
</script>
<script type="text/javascript">
<!-- Begin
document.write('This page took <span id="endTime">0.0</span> seconds to load.');
var loopTime=setInterval("currentTime()",100);
// End -->
</script>

<!-- Code End www.aptechindia.blogspot.com ------>
Continue Reading


Add Newer, Older and Home Links With Post Titles

Posted :| Posted By: Piush Trivedi | Labels: , 3 Comments

blogger-blogspot-older-posts-newer-post-link-with-titleChange posts Navigation Links Newer posts and older posts by the Corresponding Post Titles.This Awesome Blogger Hack lets your blog visitors to Know Newer and Older posts and they can go to that Posts.I got this hack from YABTB blog .This hack is done by MS-potilas of YABTB blog.All credits goes to YABTB. This awesome trick done using some jquery script.

  • First log in to Blogger
  • Go To Dashbord > Design > Edit HTML
  • And Click On Expand Widgets Tick Box
  • Now find this code : </head>
  • And just AFTER it, add this line:

<script src='https://ajax.googleapis.com/ajax/libs/jquery/1.4.4/jquery.min.js' type='text/javascript'></script>

Please Note :- If you are running any Slider or you already have jquery inplace then dont need to add this above code, because its usually runs on jQuery.

How To Use
  • Go TO Blogger--->Design--->Page Element
  • Click On Add a Gadget
  • Choose html/javascript
  • Past Below Code Inside It.

<!-- Add Newer, Older and Home Links With Post Titles by aptechindia.blogspot.com -->
<style type="text/css">
#blog-pager-newer-link {font-size:85%;width:200px;text-align:left;}
#blog-pager-older-link {font-size:85%;width:200px;text-align:right;}
</style>
<script type="text/javascript">

$(document).ready(function(){
var newerLink = $("a.blog-pager-newer-link").attr("href");
$("a.blog-pager-newer-link").load(newerLink+" .post-title:first", function() {
var newerLinkTitle = $("a.blog-pager-newer-link").text();
$("a.blog-pager-newer-link").text("<< " + newerLinkTitle);
});
var olderLink = $("a.blog-pager-older-link").attr("href");
$("a.blog-pager-older-link").load(olderLink+" .post-title:first", function() {
var olderLinkTitle = $("a.blog-pager-older-link").text();
$("a.blog-pager-older-link").text(olderLinkTitle + " >>");//rgt
});
});
</script>
<!-- Add Newer, Older and Home Links With Post Titles by aptechindia.blogspot.com -->
Continue Reading


Show Author Profile Picture Next To Google Search Results

Posted :| Posted By: Piush Trivedi | Labels: , 1 Comments

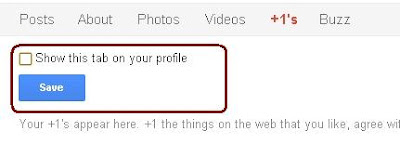
Google webmaster team has introduced an easy way of displaying your Google+ profile picture next to the links of your website or blog or any content that you generate. You might have seen profile pictures or image thumbnails of Google developers appearing on search results page. Previously only reserved users had this option but now thanks to the generosity of Google+ social network, even you can display your profile picture next to all your articles or webpages that you own. This will be a proof that you are the sole author and owner of that site or blog. The author information will be shared globally on Google results and your visitors can see your image and author information link next to your article. This is a great way to attract visitors and increase website traffic. Lets learn how to do it!
  • A website or blog that you own
  • A Google Plus Account
  • An About Me page on your blog. If you already have an about page where information about author is given then you need not worry. However if you don’t have an about page then you must create one now.

If you have met the above three conditions then you may follow these steps:

Step 1:-

On your website sidebar or header or footer add this link,

<a href="https://plus.google.com/GOOGLE+ ID"
  rel="author" target="_blank"> Join me on Google+</a>


Do not remove rel="author" else the trick wont work!


Step 2:-

Next go to your About Me page and add this link anywhere you want,

<a href="https://plus.google.com/GOOGLE+ ID"
  rel="me" target="_blank"> My Google Profile</a>


Again replace the Google+ ID with your Profile ID. You can edit the text My Google Profile if you wish.

Step 3:-

Now go to your G+ profile and click the “Edit Profile” button

Then click on the "LINKS" area as shown below,

Add your Blog/site homepage URL and also the URL of your About page. You can also add your Facebook and twitter links if you wish.

Step 4:-


Finally Save your profile and you are almost done:)

Test How your profile photo will appear on SERPs


If you have followed all steps correctly then you will be able to clearly see your photo and name appearing next to your blog title and description. You will also see this green message: "Verified: Authorship markup is correct for this page"

Continue Reading


How To Add Yahoo Smiley on Blogger Threaded Comments

Posted :| Posted By: Piush Trivedi | Labels: , 4 Comments

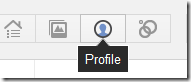
With This Simple Hack, Your Blog Readers Are Now Able To Use Yahoo Smileys/Emoticons When They Comment On Any Of your blog posts. I am sure that your readers will really get excited and enjoy using These Yahoo! Smileys. This Hack Will Only Work If You’ve Enabled Embedded Comment Form Feature For Your Blog.Follow These Steps Below To Install This Feature To Your Blog’s Template. Always Remember To Save A Copy Of Your Template Before Start Editing Your Template.


How To Use

To add these smileys, follow these 3 steps:

Step 1

  • First log in to Blogger
  • Go To Dashbord > Design > Edit HTML
  • And Click On Expand Widgets Tick Box
  • Now find this code : ]]></b:skin>
  • And just BEFORE it, add this line:

<!-- Yahoo Smileys by aptechindia.blogspot.com Code Start-->
.aptsmile {
    background: none repeat scroll 0 0 #EFF5FB !important;
    font-size: medium !important;
    padding: 10px !important;
    text-align: left !important;
    font-weight:bold !important;
    font-size:11px !important;
}
img.aptechsmly {
    height: auto !important;
    vertical-align: middle !important;
    width: auto !important;
    border:0px !important;
}
<!-- aptechindia.blogspot.com Code End-->


Step 2

  • Now find this code On Your Template: </body>
  • And just BEFORE it, add this line:
<!-- Yahoo Smileys Script aptechindia.blogspot.com -->
<script src='https://piushtrivedi.googlecode.com/svn/trunk/Aptech_india/ysmiley_Aptech.js' type='text/javascript'/>

Step 3

  • Now find this code On Your Template: <div class='post-footer-line post-footer-line-3'>
  • <div class='post-footer-line post-footer-line-3'>
    code...
    </div>
    </b:includable>
  • And just After it, add this line:

<!-- Yahoo Smileys by aptechindia.blogspot.com Start-->
<b:if cond='data:blog.pageType == &quot;item&quot;'>
<div style='background-color:#FEF8EC; border:none; width:100%; padding:10px; height:100px; overflow:auto;'>
<div class='aptsmile'>
<img alt='' class='aptechsmly' src='https://l.yimg.com/us.yimg.com/i/mesg/emoticons7/1.gif'/> :)
<img alt='' class='aptechsmly' src='https://l.yimg.com/us.yimg.com/i/mesg/emoticons7/2.gif'/> :(
<img alt='' class='aptechsmly' src='https://l.yimg.com/us.yimg.com/i/mesg/emoticons7/3.gif'/> ;)
<img alt='' class='aptechsmly' src='https://l.yimg.com/us.yimg.com/i/mesg/emoticons7/4.gif'/> :D
<img alt='' class='aptechsmly' src='https://l.yimg.com/us.yimg.com/i/mesg/emoticons7/5.gif'/> ;;-)
<img alt='' class='aptechsmly' src='https://l.yimg.com/us.yimg.com/i/mesg/emoticons7/7.gif'/> :-/
<img alt='' class='aptechsmly' src='https://l.yimg.com/us.yimg.com/i/mesg/emoticons7/8.gif'/> :x
<img alt='' class='aptechsmly' src='https://l.yimg.com/us.yimg.com/i/mesg/emoticons7/10.gif'/> :P
<img alt='' class='aptechsmly' src='https://l.yimg.com/us.yimg.com/i/mesg/emoticons7/11.gif'/> :-*
<img alt='' class='aptechsmly' src='https://l.yimg.com/us.yimg.com/i/mesg/emoticons7/12.gif'/> =((
<img alt='' class='aptechsmly' src='https://l.yimg.com/us.yimg.com/i/mesg/emoticons7/13.gif'/> :-O
<img alt='' class='aptechsmly' src='https://l.yimg.com/us.yimg.com/i/mesg/emoticons7/14.gif'/> X(
<img alt='' class='aptechsmly' src='https://l.yimg.com/us.yimg.com/i/mesg/emoticons7/15.gif'/> :7
<img alt='' class='aptechsmly' src='https://l.yimg.com/us.yimg.com/i/mesg/emoticons7/16.gif'/> B-)
<img alt='' class='aptechsmly' src='https://l.yimg.com/us.yimg.com/i/mesg/emoticons7/17.gif'/> :-S
<img alt='' class='aptechsmly' src='https://l.yimg.com/us.yimg.com/i/mesg/emoticons7/18.gif'/> #:-S
<img alt='' class='aptechsmly' src='https://l.yimg.com/us.yimg.com/i/mesg/emoticons7/19.gif'/> 7:)
<img alt='' class='aptechsmly' src='https://l.yimg.com/us.yimg.com/i/mesg/emoticons7/20.gif'/> :((
<img alt='' class='aptechsmly' src='https://l.yimg.com/us.yimg.com/i/mesg/emoticons7/21.gif'/> :))
<img alt='' class='aptechsmly' src='https://l.yimg.com/us.yimg.com/i/mesg/emoticons7/22.gif'/> :|
<img alt='' class='aptechsmly' src='https://l.yimg.com/us.yimg.com/i/mesg/emoticons7/23.gif'/> /:)
<img alt='' class='aptechsmly' src='https://l.yimg.com/us.yimg.com/i/mesg/emoticons7/24.gif'/> =))
<img alt='' class='aptechsmly' src='https://l.yimg.com/us.yimg.com/i/mesg/emoticons7/25.gif'/> O:-)
<img alt='' class='aptechsmly' src='https://l.yimg.com/us.yimg.com/i/mesg/emoticons7/26.gif'/> :-B
<img alt='' class='aptechsmly' src='https://l.yimg.com/us.yimg.com/i/mesg/emoticons7/27.gif'/> =;
<img alt='' class='aptechsmly' src='https://l.yimg.com/us.yimg.com/i/mesg/emoticons7/101.gif'/> :-c
<img alt='' class='aptechsmly' src='https://l.yimg.com/us.yimg.com/i/mesg/emoticons7/100.gif'/> :)]
<img alt='' class='aptechsmly' src='https://l.yimg.com/us.yimg.com/i/mesg/emoticons7/102.gif'/> ~X(
<img alt='' class='aptechsmly' src='https://l.yimg.com/us.yimg.com/i/mesg/emoticons7/103.gif'/> :-h
<img alt='' class='aptechsmly' src='https://l.yimg.com/us.yimg.com/i/mesg/emoticons7/104.gif'/> :-t
<img alt='' class='aptechsmly' src='https://l.yimg.com/us.yimg.com/i/mesg/emoticons7/105.gif'/> 8-7
<img alt='' class='aptechsmly' src='https://l.yimg.com/us.yimg.com/i/mesg/emoticons7/28.gif'/> I-)
<img alt='' class='aptechsmly' src='https://l.yimg.com/us.yimg.com/i/mesg/emoticons7/29.gif'/> 8-|
<img alt='' class='aptechsmly' src='https://l.yimg.com/us.yimg.com/i/mesg/emoticons7/29.gif'/> L-)
<img alt='' class='aptechsmly' src='https://l.yimg.com/us.yimg.com/i/mesg/emoticons7/31.gif'/> :-a
<img alt='' class='aptechsmly' src='https://l.yimg.com/us.yimg.com/i/mesg/emoticons7/32.gif'/> :-$
<img alt='' class='aptechsmly' src='https://l.yimg.com/us.yimg.com/i/mesg/emoticons7/33.gif'/> [-(
<img alt='' class='aptechsmly' src='https://l.yimg.com/us.yimg.com/i/mesg/emoticons7/34.gif'/> :O)
<img alt='' class='aptechsmly' src='https://l.yimg.com/us.yimg.com/i/mesg/emoticons7/35.gif'/> 8-
<img alt='' class='aptechsmly' src='https://l.yimg.com/us.yimg.com/i/mesg/emoticons7/36.gif'/> 2:-P
<img alt='' class='aptechsmly' src='https://l.yimg.com/us.yimg.com/i/mesg/emoticons7/37.gif'/> (:|
<img alt='' class='aptechsmly' src='https://l.yimg.com/us.yimg.com/i/mesg/emoticons7/38.gif'/> =P~
<img alt='' class='aptechsmly' src='https://l.yimg.com/us.yimg.com/i/mesg/emoticons7/39.gif'/>
<img alt='' class='aptechsmly' src='https://l.yimg.com/us.yimg.com/i/mesg/emoticons7/40.gif'/> #-o
<img alt='' class='aptechsmly' src='https://l.yimg.com/us.yimg.com/i/mesg/emoticons7/41.gif'/> =D7
<img alt='' class='aptechsmly' src='https://l.yimg.com/us.yimg.com/i/mesg/emoticons7/42.gif'/> :-SS
<img alt='' class='aptechsmly' src='https://l.yimg.com/us.yimg.com/i/mesg/emoticons7/43.gif'/> @-)
<img alt='' class='aptechsmly' src='https://l.yimg.com/us.yimg.com/i/mesg/emoticons7/44.gif'/> :^o
<img alt='' class='aptechsmly' src='https://l.yimg.com/us.yimg.com/i/mesg/emoticons7/45.gif'/> :-w
<img alt='' class='aptechsmly' src='https://l.yimg.com/us.yimg.com/i/mesg/emoticons7/47.gif'/> 7:P
<img alt='' class='aptechsmly' src='https://l.yimg.com/us.yimg.com/i/mesg/emoticons7/48.gif'/> 2):)
<img alt='' class='aptechsmly' src='https://l.yimg.com/us.yimg.com/i/mesg/emoticons7/109.gif'/> X_X
<img alt='' class='aptechsmly' src='https://l.yimg.com/us.yimg.com/i/mesg/emoticons7/110.gif'/> :!!
<img alt='' class='aptechsmly' src='https://l.yimg.com/us.yimg.com/i/mesg/emoticons7/111.gif'/> \m/
<img alt='' class='aptechsmly' src='https://l.yimg.com/us.yimg.com/i/mesg/emoticons7/112.gif'/> :-q
<img alt='' class='aptechsmly' src='https://l.yimg.com/us.yimg.com/i/mesg/emoticons7/113.gif'/> :-bd
<img alt='' class='aptechsmly' src='https://l.yimg.com/us.yimg.com/i/mesg/emoticons7/114.gif'/> ^#(^
<img alt='' class='aptechsmly' src='https://l.yimg.com/a/i/us/msg/emoticons/pirate_2.gif'/> :ar!
</div></div></b:if>
<!-- Yahoo Smileys by aptechindia.blogspot.com End-->


Finally save the template :)
Continue Reading